Raymarching Demo
- JavaScript
- WebGL
- GLSL
- Raymarching
- Shaders & FX
0 Comments
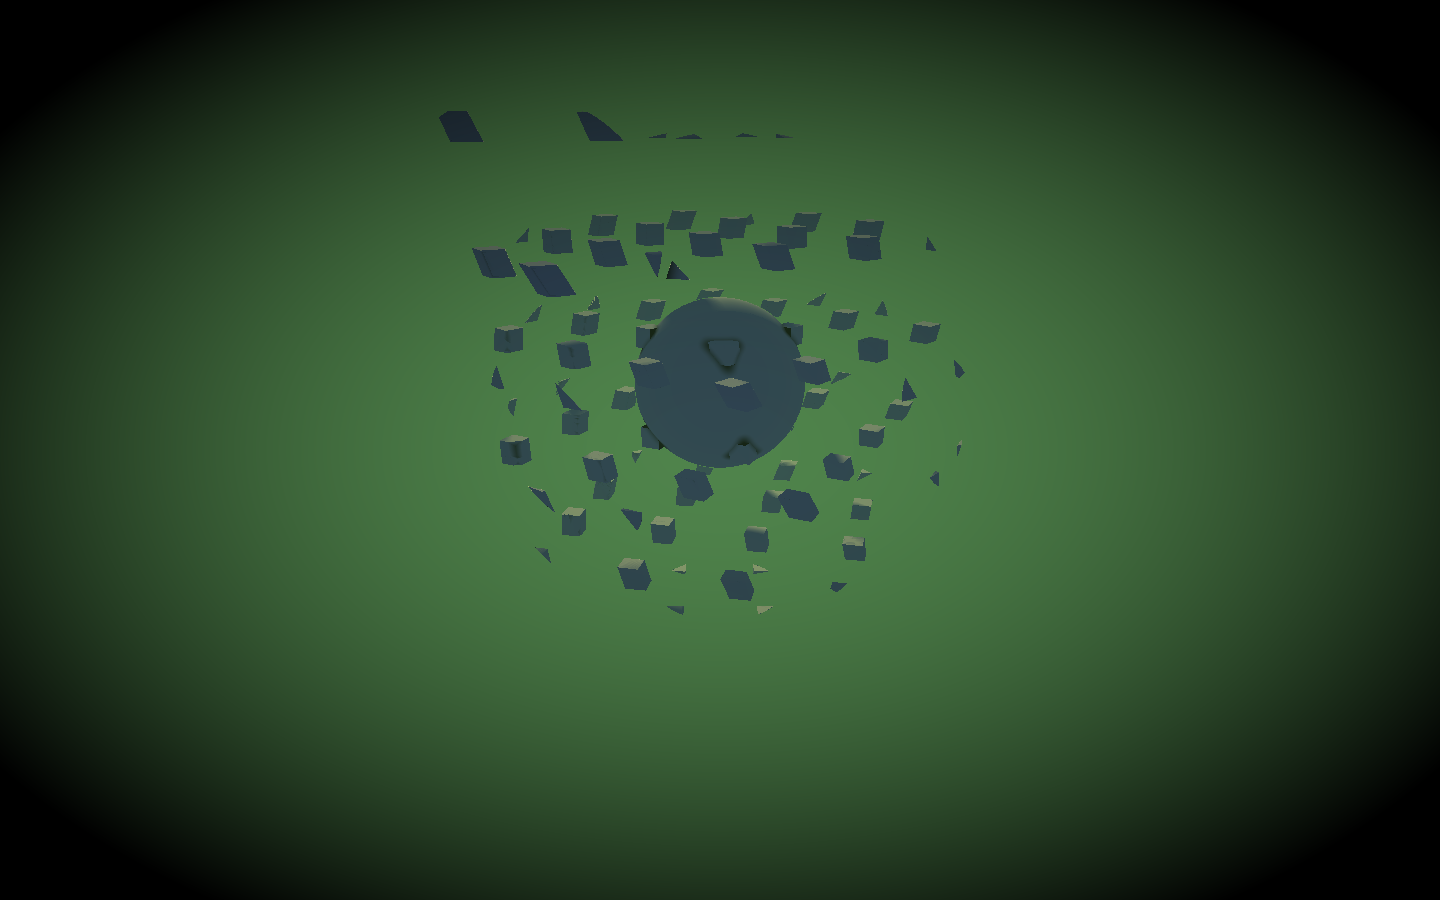
Table of contents
What is the Demoscene?
The demoscene is an international computer art subculture that specializes in producing demos: small, self-contained computer programs that produce audio-visual presentations. The main goal of a demo is to show off programming, artistic, and musical skills.
Why make a demo?
What’s this good for? What can you do with it? It’s just an animation.
Well, sometimes a demo can be a lot more than just a crazy animation, sometimes a demo can become a piece of art. Since I find demos to be extremely interesting, I decided that I would create a little demo just to get used to some of the techniques that are required for making one.
Hopefully, I will learn a lot more about this in the future and become even better because the joy of making something beautiful is indescribable.
My demo
So, for my first demo I decided to go with something simple yet cool looking.
Shader
For the shader I used a method called raymarching which I’ll roughly describe as:
Shoot rays out of the camera and paint every pixel based on what its specific ray hits.
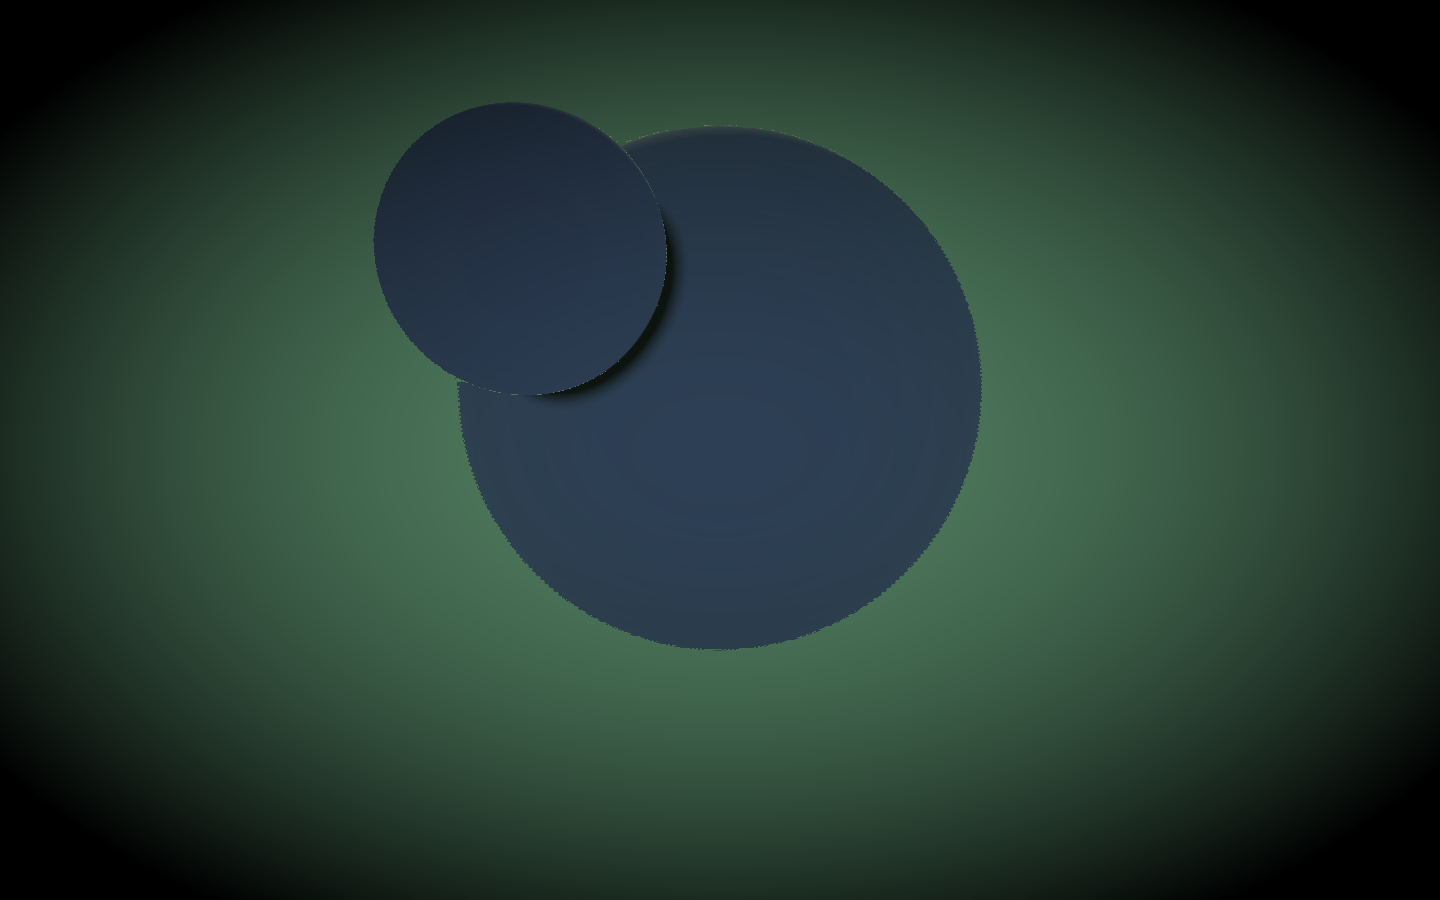
The base of my demo was simply 2 spheres, a large one with a smaller one orbiting it. It reminded me of an atom with an electron in an orbit around it.
I then created a domain with a single cube and repeated that domain infinitely. Thanks to iq and his amazing functions, I then created an extrusionfield based on that repeated domain. Then I used the intersect operation to create a cool effect between the extrusionfield and the spheres.
In the end I used the twist operation to rotate the cube domain a little bit for added effect.
Since I’m using raymarching, ambient occlusion and shadow casting becomes really cheap, which is great, cause that means I can use it to make everything look even better! Again, thanks to iq and his formulas, this was easy to implement.
All the distance functions and operations can be found here.
Audio
It was now time to add some animation to this whole thing! Since using sine wave animation based on time looks very static and boring, it was time to sync the animation to some music. The way I went about doing this was by fetching the FFT from the audio track and picked out the frequencies that I wanted.
I picked out 3 different ranges from the FFT spectrum that I was going to send to the shader.
The entire spectrum lies between 0.0 - 1.0 and the ranges that I picked were the average of all the frequencies inside that specific range.
- fft_low: 0.1 - 0.2
- fft_mid: 0.3 - 0.5
- fft_high: 0.6 - 0.75
What I then did was add these variables a little here and there in the shader until I got some cool movement.
FX
Having nothing but a shader isn’t enough, it was time to add some cool FX! The vignette and blur effect that can be seen in the demo are written in another shader.
For this to work I had to do a multipass. So, I used a framebuffer that I sent to the FX shader as a texture and then rendered that onto the screen, pretty simple and easy stuff, yet makes such a big difference!
I wanted this to also be synced to the music, so I let the blur depend on the fft_high range which gives the demo a sweet blur when the beat drops.
Summary
That was pretty much it for this demo, it was fun making and was mostly for learning. I didn’t generate my own music though because that’s a bit tricky, but I’ll save that for the next time.
For now, just enjoy the sweet track I’ve Fallen For You by Tom Redwood while watching the demo below.